
Hook removal tools, such as quick-release devices, are increasingly favored by anglers to minimize fish impact during catch-and-release, enhancing survival rates and promoting sustainable fishing practices. Discover the skill of crafting your own quick-release hook removal tool.
Story by Alexa Millward
Maximizing Fish Survival with Hook Removal Tools
As catch-and-release fishing has grown in popularity, so has the conversation around minimal-impact fish handling. We are heartened to see many anglers thoughtfully approach their catch-and-release practices to increase the rates of survival for fish. Studies continue to show that simple actions can greatly increase those rates of survival. These conversations have led to innovations such as the “quick-release tool” or “de-hookers.”
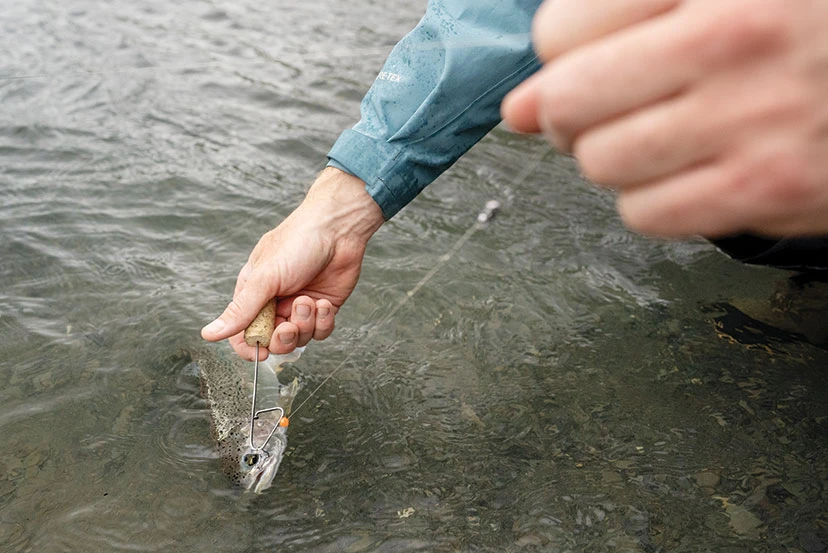
Releasing a rainbow trout with a quick-release tool. © Trout Unlimited
Best Practices for Fish Handling
Fish experience stress as soon as they are hooked. Although they may swim back strong, they inevitably experience a recovery period once released. They can be susceptible to predators, disease, and reduced reproductive success at this stage. This is why it is crucial for anglers to utilize best practices when handling and releasing fish. Some of these best practices include using barbless hooks and a rubber net, wetting hands before handling the fish to protect the fish’s natural slime coating, not removing the fish from the water, keeping hands away from the gill plates, and supporting the entire body of the fish. Another is using a quick-release so that you can release fish without even netting or touching them.
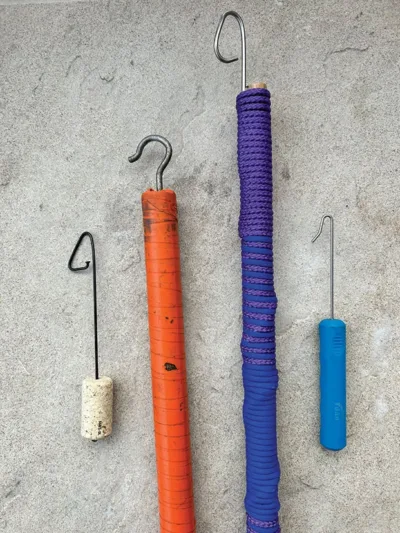
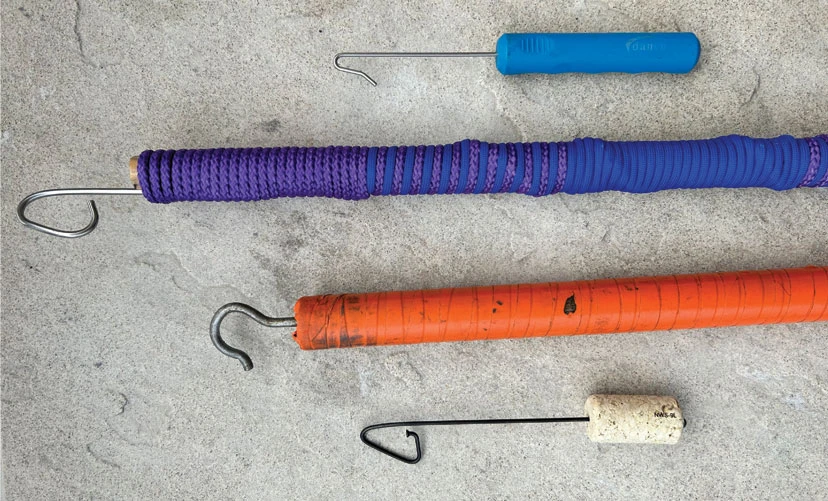
Various examples of quick-release tools in all shapes and sizes. © Alexa Millward
What is a Quick-Release Tool?
So, you may be wondering, what’s a quick-release tool anyway? It is a simple tool that allows you to release a fish quickly, hence the name, but more importantly it allows you to release a fish without removing it from the water or handling it. To use, you slide the triangular portion of the tool down to the shank of the hook and lift the tool to invert the hook until it slides out of the fish’s mouth.
Benefits of Using Hook Removal Tools
A quick-release tool is great for many reasons. Although minimizing impact on the fish is the primary benefit of this tool, we can’t deny that allowing you to get your fly quickly back in the water in search of that trophy fish is another great benefit!
Kenai Guide Ambassador, Dallas Voss with Explore Kenai, states, “Using the quick-release tool is a no-brainer. In addition to the obvious benefits to the fish, the tool saves time and energy, quickly releasing the fish and letting our clients get back to fishing.”
Practical Use in Alaska and Beyond
These tools especially come in handy here in Alaska during what we all know as “the bead bite.” This is the time of year when sockeye salmon are spawning, and trout and char are gorging themselves. During this time, you may catch fish in abundance and will inevitably accidentally hook one of the many spawning sockeyes as well. The quick-release tool comes in handy to release trout as well as those zombified salmon, so they can continue their life journey and successfully spawn.
Making and Obtaining Hook Removal Tools
Quick-release tools come in many shapes and sizes, but can be hard to find in stores. On the bright side, they are a really simple tool to make! We have seen anglers get very creative when it comes to making them. They can even be a fun winter project as you dream about the fishing season ahead. Trust us, they are a tool you won’t want to leave home without!
DIY Quick Release Tool
Materials Needed:
- Wine cork or wooden dowel for the base section (benefits of a wine cork or wood; it floats!)
- Bike spoke or a type of strong steel material for the “release” section
- Good pair of pliers
- Drill
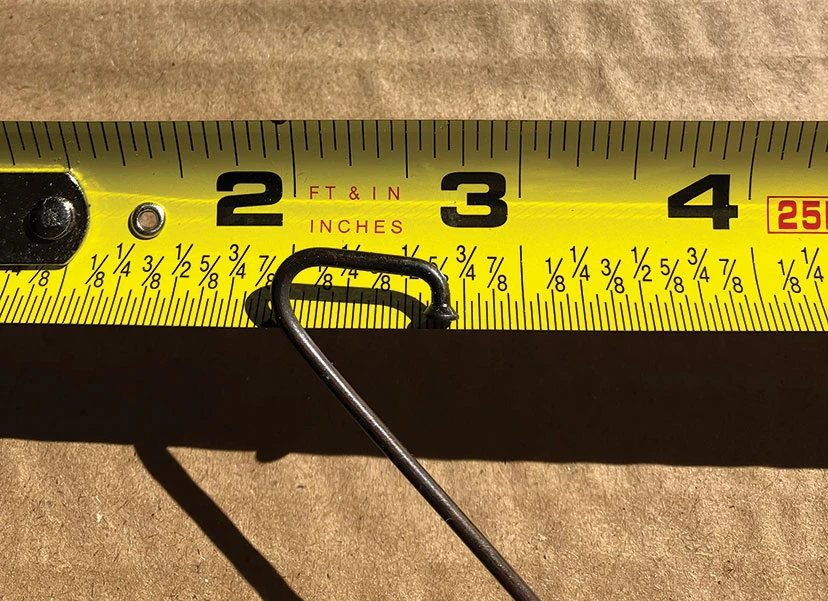
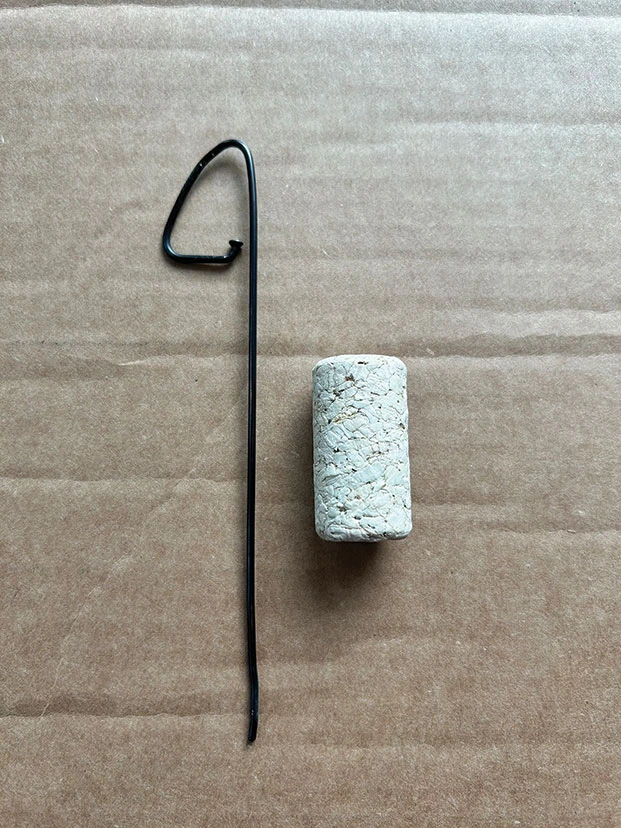
Step 1: Create the “release” section. Bend the spoke into a spiral loop or hook shape, leaving a slight opening from the straight portion of the spoke. This allows your fishing line to slide into the bent portion of the tool to meet the hook for the release.
First bend is about ¾ inch, and second bend is about 1 inch for this example. © Alexa Millward
Step 1.
Step 2.
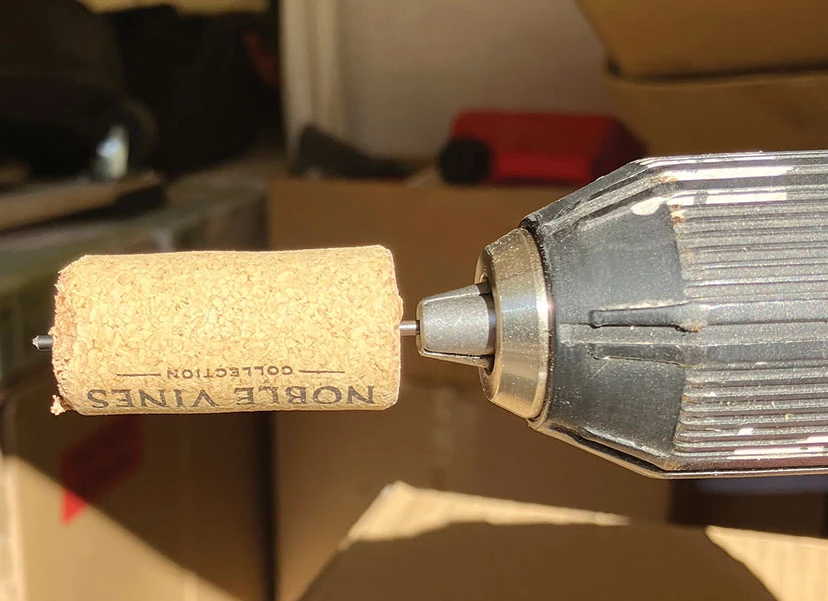
Step 2: Create the base. Cut a piece of the steel material to use as a drill bit, or just use a drill bit the same diameter as the spoke. Drill lengthwise through the center of the cork.
Step 3: Connect it all together! Insert the “release” section into the drilled hole in the cork. Create a slight bend in the bottom section of the inserted spoke, below the cork. This bend will prevent the spoke from getting pulled back out of the cork. Before finishing the release by pushing the final bend into the cork, a split ring may be attached. This is a great addition to attach a retractable cord or lanyard to! © Alexa Millward
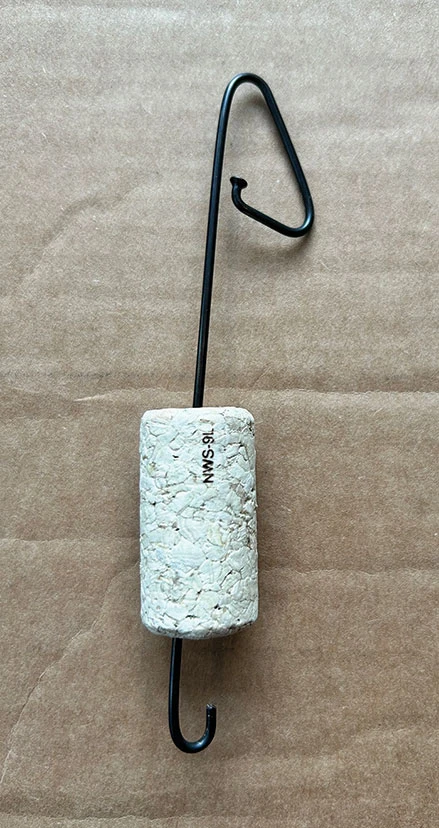
Step 3.
*Thanks to Damond Blankenship for these step-by-step instructions! To see a quick-release tool in action, visit @TroutUnlimitedAlaska on Instagram or Facebook.
Trout Unlimited’s mission is to protect, reconnect and restore North America’s coldwater fisheries and their watersheds. Learn about our work in Alaska at tu.org/alaska. Alexa Millward is the Kenai Peninsula Engagement Coordinator.
For more fish conservation reading like this hook removal tool DIY guide, check out Fish Alaska’s Conservation Blog.