Alaska’s remote rivers are just that: remote. In many cases, floating the rivers on extended trips is the only way to access the untold number of delights these wild and scenic waterways hold for the outdoors enthusiast. Here, on these rivers, in this unforgiving land, the last thing a traveler wants is for catastrophe to strike. Here is what you need to know when repairing a raft in the field.
Field Repair of Inflatables
by Tracey Harmon
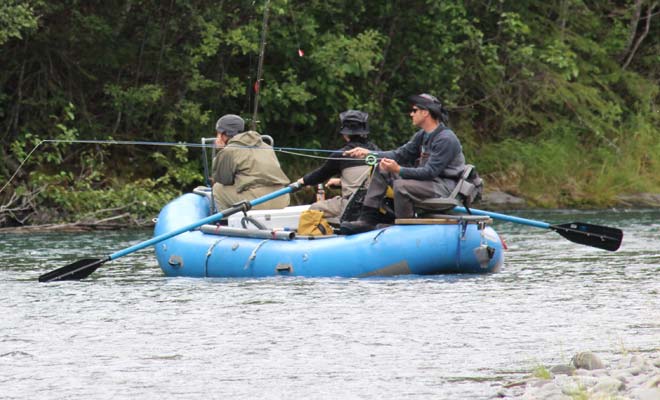
And where there are so many things that can go wrong—things completely out of the floater’s control—it’s wise to take a determined look at those things that can be controlled. One is the care and repair of the inflatable used to make the trip. [emember_protected custom_msg=’This content is available for subscribers only.’]
Today’s commercial duty inflatables can take a lot of punishment before sufferingcrippling damage. That is a result of the constant efforts by responsible manufacturers to build a better quality product, and to remain afloat in their highly competitive market. But every once in awhile something happens that mandates a major field repair, and that is where I can help you get back on the water . . . without having to redo your work a mile downstream.
The Repair Attitude
Though field repairs are usually approached differently than repairs completed in a shop, that is not necessarily the approach to take. A properly completed repair, whether completed in the field or in a shop, is just that: proper, and therefore, permanent.
The Repair Itself
All adhesives are moisture, temperature, wind, and UV sensitive. On most field repairs you will not need to worry about UV damage to the adhesive, as you will be attempting to complete the repair in a timely fashion; humidity, temperature, and wind must be controlled, though, for a proper and permanent repair. A high humidity will simply “dump” moisture on your adhesive. However, humidity is also pulled from the air by the catalytic action of the adhesive. Wet glue does not work.
Low temperatures are just as detrimental as humidity to the adhesive. Wind dries the surface of the glue, leaving wet, uncured glue below the surface. Unstable glue is just as likely to let go under pressure as is unstable snow. A wet, cold, windy Alaska day demands that you set up a tarp over the work area and fire up the camp stove, being careful of open flames around flammables! You must have a warm, dry area when repairing a raft permanently.
The Work Plan
Don’t work from a first impression. Take the time to really study the damage, and to mentally map out the repair itself. Once you have control of your environment, and a game plan in mind, you have two of the three steps of a field repair done. Now all that is needed is to lay out the tools you will need in the order you will need them and to get to the repair.
Re-assembly
Now that you know what you are going to do in order to affect the repair, pull the damaged area back into its true shape. A simple hole will not require any support, but a tear may. Duct tape, placed on the inside of the boat, through the hole created by the damage, will hold almost all simple tears or cuts in position. Even most compound openings can be held in place with duct tape placed on the inside of the opening. Some major damages may require stitching. If that is the case, you will need to sand the edges of the fabric before beginning the stitching operation. Always use a baseball stitch when sewing is necessary.
I know this will sound odd, but you will achieve a better repair if it can be made while the boat is inflated! This is true for small damages. You can sand the area to be repaired while the boat is deflated, but you will most certainly achieve a tighter bond between the patch and the boat if the patch is applied while the boat is inflated. A patch applied to an inflated boat does not suffer from stretching as the boat is inflated.
Moderate to major damage will require the repair be made while the boat is deflated. If this is the case, make certain all creases and folds are worked out prior to beginning.
The Final Test
Minor repairs, such as pinholes repaired with Aquaseal or a patch, can be tested immediately with moderate air pressure and may need only a few hours cure-time before proceeding with your trip. Moderate damage, such as a pencil size puncture or a very small rip, can also be tested immediately with moderate air pressure but will need a few hours cure time before proceeding under moderate air pressure. Major repairs can be inflated to shape in order to test for leaks but should not be put under any real pressure for at least 24 hours. You should also operate any boat that suffered any major damage under moderate pressure for at least the next two days. Rushing the job will only cause you to start the process over!
Cleanup
If you failed to stay within the lines when applying the adhesive, now is the time to clean away the excess. Once again, use the appropriate solvent for your adhesive, but be careful! If you get too aggressive with the cleaning process you may loosen the edges of your patch. Do not worry about that thin line of adhesive at the patch’s edge as that small line may make the difference between a loose, or tight, patch. Make sure all contaminated rags, brushes, and tools are placed in a zip-lock bag and stored away safely for your trip out. Do not leave any sign of your repair to pollute the environment you and I enjoy so much.
STEP 1 • Cleaning
Clean all surfaces to be repaired before starting the repair process. This may be as simple as buffing a fairly clean surface. A dirty, or contaminated surface (gas, oil, or any UV protectants) needs to be cleaned with the appropriate solvent. Be careful! Excess Toluene can streak rubber fabrics, and MEK (methyl ethyl ketone) can cause serious damage to plastic fabrics.
STEP 2 • Layout
Cut your patch to shape (beveling the edges and rounding the corners will control edge lifting later), making sure to leave a minimum of two inches of material between any damage and the edge of the patch. Now dry-fit the repair by laying your patch over the area to be repaired and trace the patch with a ball point pen. You now have your work area. Stay at that line while sanding and gluing. Not only will your finished repair look professional, you will make your kindergarten teacher proud!
STEP 3 • Grinding
Both rubber and hardened or coated-plastic boat fabrics (such as Maravias and SOTARS) will accept a patch better, and more tightly, if the surface has been sanded. The roughened surface provides for a stronger bond through increased mechanical action. Use a 60-grit wet/dry paper in the field. It is not so aggressive it will cause instant damage to the fabric, nor is it so small a grit that the paper clogs with residue. A properly buffed surface will look and feel like suede. That look and feel means all the shine has been removed from both fabric surfaces in a uniform manner. Do not simply gouge the surface.
All too often one hears they must also clean a freshly ground area with solvent. Don’t bother. Doing so can actually destroy some of the work accomplished during the buffing process. Simply brush away the residue with a clean, dry rag or the heel of your hand.
STEP 4 • Glue Preparation & Application
Most good adhesives are two-part compounds. Make sure you use a good two-part as most one-part adhesives never truly harden and may let go when left in a moderately warm sun! A two-part will also dry to a useable surface within minutes of application, if the humidity and temperature are properly taken into account, whereas a one-part adhesive may need from 60 minutes to overnight to dry to a useable format! Make sure you are using quality adhesives, such as Clifton’s FA-4844 for rubber (EPDM, Hypalon, or neoprene). Clifton’s FA-4009 is excellent for plastics (PVC, urethane), as is StaBond’s UK-148.
A properly mixed adhesive will contain the manufacturer’s recommended amount of catalyst or hardener. It will also be readily spread. Thick adhesive spreads hard, pulling bristles from the brush and causing one to overwork the adhesive. These problems can be alleviated by adding just enough of the proper solvent (MEK for plastic adhesives and Toluene for rubber adhesives) to achieve the viscosity of 30-weight motor oil. Don’t over-thin your adhesive. Just add the solvent necessary to make the glue spread easily and quickly.
Apply one thin coat of adhesive to both the boat and the patch. Once the surface becomes hard to the touch (using the back of a knuckle as a test surface), which will take about 5 to 15 minutes in your controlled environment, apply another thin, even coat of adhesive. Here you can take one of two approaches to apply the patch. You can apply the patch when the second coat of adhesive is JUST ABOUT DRY, or, my favorite, you can allow the second coat of adhesive to dry completely, and then re-activate the adhesive to apply the patch
STEP 5 • Patch Application
Applying the patch when the second coat is just barely tacky allows one to complete the repair without additional solvent. It can also be a disaster if you are not careful – careful to make sure no moisture exists on the glued surfaces. I personally believe the best avenue is to re-activate the second coat of adhesive then apply the patch. Re-activation is accomplished by “flashing” the glued surfaces with a rag dampened with the appropriate solvent, or by applying heat. If you choose flashing, wait 15 to 30 seconds to apply the patch, as you must allow the solvents to escape. The application of heat can be achieved by simply heating a pot of water to body temperature and setting the pot over the fitted patch for a couple of minutes. Chemical heat patches, such as hand warmers, also work well.
Lay the patch in place so that you do not trap any air. This is best accomplished by setting the “heel” of the patch down first then rolling the patch in place. Rolling should be a process that pushes all air from under the patch and causes the two glue surfaces to chemically and mechanically bond to each other. Apply sufficient force to make sure of adequate bond but do not over work the rolling operation or you could loosen the adhesive from one of the surfaces! [/emember_protected] [emember_protected scope=”not_logged_in_users_only”]
- Need to subscribe? Now’s a good time! Check out our current subscription specials!
- Already a subscriber? Login below to access all of our online articles and content!

